Recipe for old fashioned chocolate icing—a timeless treat that’s perfect for any occasion! This guide dives deep into the history, variations, and everything you need to know to whip up a batch of this delicious icing, from the perfect consistency to the most awesome decorating tips.
This isn’t your grandma’s boring icing recipe. We’ll explore different cocoa powders, butter vs. shortening, and even vegan options, so you can customize it to your liking. Get ready to level up your baking game with this comprehensive guide.
Introduction to Old Fashioned Chocolate Icing
Old-fashioned chocolate icing, a beloved confectionery staple, holds a rich history intertwined with the evolution of baking and dessert traditions. Its origins can be traced back to the late 19th and early 20th centuries, emerging as a simpler, more accessible alternative to elaborate, often imported, chocolate coatings. This straightforward recipe allowed home bakers to create delicious chocolate glazes, transforming cakes and pastries with a touch of decadent flavor.This classic icing, often referred to as “chocolate fudge icing,” offers a smooth, glossy finish and a robust chocolate flavor, contrasting with the more elaborate and often chemically-enhanced modern versions.
Understanding its simple composition provides insights into the art of baking and the historical evolution of culinary techniques.
Ingredients and Their Importance
The key to achieving a truly authentic old-fashioned chocolate icing lies in its simple yet carefully chosen ingredients. The precise ratios and quality of each component contribute significantly to the final texture and flavor profile.
- Sugar: Granulated sugar forms the foundation of the icing, providing sweetness and contributing to the smooth texture. The amount of sugar influences the overall sweetness and consistency of the icing. Using high-quality granulated sugar ensures a clean and consistent taste.
- Cocoa Powder: A crucial component, providing the rich chocolate flavor. High-quality cocoa powder, often Dutch-processed, yields a deeper, more nuanced chocolate flavor compared to other types. This ingredient should be measured accurately to achieve the desired chocolate intensity.
- Butter: High-quality unsalted butter contributes to the creamy texture and rich mouthfeel of the icing. It also helps to emulsify the other ingredients, creating a smooth, even coating. The butter should be at room temperature for proper mixing.
- Milk: Adding milk, often whole milk, enhances the creamy texture and adds a touch of richness to the icing. The milk helps to thin the icing to the desired consistency, ensuring it spreads evenly over the baked goods.
Key Differences from Modern Variations
Modern chocolate icings often employ shortcuts and alternative ingredients to achieve a faster or more uniform result. These modern variations frequently differ significantly from the traditional method.Old-fashioned chocolate icing relies on a meticulous approach, emphasizing quality ingredients and a slower cooking process to achieve its distinctive texture and flavor. Modern alternatives might use powdered sugar, artificial flavorings, or pre-made chocolate compounds, sacrificing the complexity and nuanced flavor of the traditional recipe.
Typical Recipe Components
The following table Artikels the typical ingredients and quantities used in an old-fashioned chocolate icing recipe. These proportions provide a starting point; adjustments may be necessary based on desired sweetness and consistency.
| Ingredient | Quantity | Notes |
|---|---|---|
| Granulated Sugar | 1 cup | Use high-quality granulated sugar for optimal sweetness and texture. |
| Unsweetened Cocoa Powder | 1/2 cup | High-quality Dutch-processed cocoa powder is recommended. |
| Butter | 1/2 cup (softened) | Use unsalted butter for best flavor control. |
| Milk | 1/4 cup | Whole milk is recommended for a richer flavor. |
| Vanilla Extract | 1 teaspoon | Adds a touch of flavor complexity. |
Recipe Variations
Exploring the diverse possibilities of old-fashioned chocolate icing, we delve into variations using different cocoa powders, sweeteners, and fat sources. Understanding these nuances allows for tailoring the icing to specific preferences and desired outcomes. Each variation contributes to the rich history and versatility of this classic dessert topping.
Comparative Analysis of Chocolate Icing Recipes
Different recipes yield distinct results, making it important to understand the components and their influence. This table highlights three different old-fashioned chocolate icing recipes, highlighting key differences.
| Recipe | Cocoa Powder | Sweetener | Fat | Notes |
|---|---|---|---|---|
| Recipe A | Dutch-processed cocoa powder | Powdered sugar | Butter | Produces a smooth, glossy finish, with a more intense chocolate flavor. |
| Recipe B | Natural cocoa powder | Granulated sugar | Shortening | Results in a slightly less glossy icing, with a more subtle chocolate flavor. |
| Recipe C | Unsweetened baking cocoa | Powdered sugar | Vegan butter substitute | Provides a rich, chocolate flavor and a smooth texture, suitable for vegan diets. |
Impact of Cocoa Powder Type
The type of cocoa powder significantly influences the final product’s flavor and texture. Dutch-processed cocoa powder, for instance, is alkalized, resulting in a smoother, more intensely flavored icing with a less bitter taste compared to natural cocoa powder. Unsweetened baking cocoa, while often used in baking, provides a robust chocolate flavor in icings, but may require adjustments in sweetness to achieve desired balance.
Vegan Old-Fashioned Chocolate Icing
A vegan version of this classic icing can be achieved by substituting dairy-based butter with a vegan butter alternative. A recipe using a vegan butter substitute, like a plant-based spread, powdered sugar, and cocoa powder, is both delicious and suitable for those following a vegan lifestyle. Careful attention to the type of vegan butter substitute and the amount of cocoa powder used will produce a satisfying icing with a rich chocolate flavor.
Comparison of Butter and Shortening
Butter contributes a richer, more complex flavor to the icing, adding a depth of taste and a luxurious feel. Shortening, on the other hand, creates a smoother, more glossy texture, ideal for a uniform coating. The choice between butter and shortening often comes down to personal preference and desired visual appeal of the icing.
Effects of Different Sweeteners
The type of sweetener impacts the icing’s texture and overall taste profile. Powdered sugar, with its fine consistency, dissolves easily, resulting in a smooth, spreadable icing. Granulated sugar, however, might require more time to dissolve and may contribute a slightly grainy texture to the final product. Experimentation can reveal which sweetener best complements the specific cocoa powder and desired texture.
Ingredients and Substitutions
Crafting the perfect old-fashioned chocolate icing hinges on understanding the role of each ingredient and the potential impact of substitutions. Accurate measurements and the quality of ingredients play a critical role in achieving a smooth, glossy, and flavorful final product. Today, we’ll delve into the specifics of each ingredient, exploring alternatives and their effects on the overall outcome.
From milk types to cocoa powder varieties, we’ll uncover the secrets to achieving a truly exceptional chocolate icing.
Ingredient Function and Importance
The ingredients in this recipe work in concert to achieve a specific texture and taste profile. Sugar provides sweetness and helps to create a smooth consistency. Butter adds richness and creaminess, while milk contributes moisture and a balanced flavor. Cocoa powder provides the chocolate flavor and color. These components must be balanced for the best result.
Sugar
Granulated sugar is the primary sweetener in this recipe. Its role is to add sweetness and, crucially, to create a smooth texture. Substituting with other sweeteners, like powdered sugar or honey, will alter the texture and sweetness level. A higher proportion of powdered sugar can result in a stiffer icing, while honey adds a unique flavor profile.
Precise measurement of sugar is essential to maintain the desired sweetness and consistency. An excess of sugar could result in a grainy or overly sweet icing, while a deficiency will lead to an under-sweetened outcome.
Butter
Unsalted butter is essential for its contribution to the icing’s richness and smooth texture. Its fat content creates a creamy and spreadable consistency. Substituting with margarine or shortening will likely affect the final product’s texture, potentially making it less smooth or creamy. The fat content of the alternative might also influence the icing’s spreadability and overall flavor profile.
The quality of butter will significantly affect the taste and consistency of the icing.
Milk
| Milk Type | Taste | Consistency |
|---|---|---|
| Whole Milk | Rich, full-bodied flavor | Creamy, smooth consistency |
| 2% Milk | Balanced flavor, slightly less rich | Good spreadability |
| Skim Milk | Subtle flavor | Can lead to a slightly thinner icing |
| Non-dairy milk (e.g., almond, soy) | Unique flavor based on the milk type | May affect the icing’s texture and spreadability. Could require adjustments to other ingredients |
Different types of milk affect the taste and consistency of the icing. Whole milk delivers a rich, creamy texture, while skim milk might result in a thinner icing. Non-dairy milk alternatives will impart their own unique flavor and potentially require adjustments to achieve the desired consistency.
Cocoa Powder
High-quality Dutch-processed cocoa powder is recommended. It contributes the chocolate flavor and color to the icing. Substituting with lower-quality cocoa powder will likely affect the flavor and intensity of the chocolate taste. The processing method of the cocoa powder can also impact the final product. Measuring cocoa powder accurately is critical for achieving the desired chocolate intensity.
Accurate Measurements
Precise measurements of all ingredients are vital for a successful icing. Even slight variations in ingredient amounts can significantly alter the final product’s taste and texture. Using measuring cups and spoons designed for dry and liquid ingredients ensures accuracy. Employing digital scales for precise measurements is an option for achieving the most consistent results. Recipes usually specify the quantities needed for a particular outcome, and adhering to those specifications will yield the best result.
Steps and Procedures
Preparing old-fashioned chocolate icing involves precise steps and careful attention to detail. A smooth, glossy finish is achievable with the right techniques and equipment. Understanding the nuances of mixing and recognizing potential problems will yield a consistently delicious result.Achieving the perfect consistency for old-fashioned chocolate icing relies on proper mixing techniques. Variations in ingredients and equipment can affect the final product, highlighting the importance of meticulous attention to each step.
Equipment Needed
The proper equipment is crucial for successful icing preparation. The tools you select will directly impact the consistency and quality of the final product.
- A stand mixer or hand-held mixer is essential for proper mixing.
- A large mixing bowl is necessary for holding the ingredients and allowing for adequate mixing.
- Measuring cups and spoons are vital for accurate ingredient measurements.
- Spatulas or a whisk are used to incorporate ingredients and ensure even mixing.
- A candy thermometer (optional, but recommended) is helpful for monitoring the temperature of the ingredients.
Mixing Techniques
Proper mixing techniques are essential for achieving a smooth and even consistency. These techniques will also reduce the risk of lumps or unevenly distributed ingredients.
- Using a stand mixer, set the mixer on low speed and add the ingredients. Gradually increase the speed to medium, mixing until the ingredients are well combined. A stand mixer’s consistent action is crucial for a smooth texture.
- If using a hand-held mixer, mix the ingredients on low speed initially. Gradually increase the speed to medium, mixing until well combined. Careful attention to the speed and duration of mixing is important to avoid overmixing, which can lead to a tough icing.
- Always incorporate ingredients in a specific order. This will ensure that all ingredients are properly incorporated and that the icing achieves the desired consistency.
- For best results, make sure to scrape down the sides of the bowl frequently to prevent ingredients from sticking and ensure even mixing.
Step-by-Step Instructions
Following the step-by-step instructions is crucial for achieving the perfect old-fashioned chocolate icing.
- Combine the powdered sugar, cocoa powder, and salt in a large mixing bowl. Ensure the ingredients are evenly distributed to avoid lumps.
- Gradually add the milk or water, one tablespoon at a time, and mix until the icing reaches the desired consistency. It’s important to add the liquid gradually to control the thickness of the icing.
- If using a stand mixer, continue mixing on low speed until the icing is smooth and creamy. For hand-held mixers, use medium speed until smooth. Consistent mixing is vital to a smooth texture.
- Add the melted butter or shortening, mixing until well incorporated. This step is critical to achieving the desired smoothness and texture of the icing.
- Stir in the vanilla extract. Ensure the vanilla extract is fully incorporated into the icing.
- If necessary, add more milk or water, a tablespoon at a time, until the desired consistency is reached. Adjusting the liquid will fine-tune the icing’s spreadability.
- Test the icing by spreading a small amount on a piece of parchment paper. This will help determine if the icing needs more liquid.
- Cover and refrigerate the icing for at least 30 minutes to allow the flavors to meld and the icing to thicken slightly. This will also allow any excess moisture to settle.
Potential Problems and Solutions
Recognizing potential problems and having solutions ready will prevent a frustrating experience.
- Icing too thick: Add a little more milk or water, one tablespoon at a time, until the desired consistency is reached. Always add liquid gradually to control the final consistency.
- Icing too thin: Add a little more powdered sugar, one tablespoon at a time, until the icing reaches the desired consistency. Powdered sugar helps to thicken the icing.
- Icing lumpy: Mix the ingredients on low speed initially, and ensure you scrape down the sides of the bowl frequently to ensure even mixing. Proper mixing techniques will prevent lumps.
- Icing grainy: Use a stand mixer on low speed and incorporate the ingredients slowly, scraping the bowl frequently. This will prevent a grainy texture.
Stand Mixer vs. Hand-Held Mixer
The choice between a stand mixer and a hand-held mixer depends on the user’s preference and the volume of icing being prepared.
- Stand mixer: Ideal for larger batches, providing consistent and powerful mixing, minimizing the effort required for large quantities. Its constant action is crucial for a smooth and even texture.
- Hand-held mixer: More suitable for smaller batches, allowing for greater control and maneuverability. It’s a practical choice for individual bakers or smaller recipes, ensuring that the icing is properly combined.
Tips and Tricks for Success
Achieving a professional-looking, perfectly consistent old-fashioned chocolate icing requires a keen eye and a steady hand. This section will delve into essential techniques to help you master the process, ensuring your icing is both beautiful and delicious. From preventing common pitfalls to exploring creative decorating methods, these tips will elevate your baking experience.
Achieving a Professional Finish
A professional-looking finish often hinges on attention to detail throughout the entire process. Ensure your mixing bowls and utensils are clean and free of any residue that might affect the color or texture of the icing. Consistent stirring is crucial for achieving a smooth, even application. Use a spatula or a whisk to incorporate ingredients evenly, avoiding lumps and streaks.
Properly leveled surfaces for icing application are vital. Use a consistent, light pressure to ensure a smooth and even spread.
Perfecting the Consistency
Consistency is key for a beautiful and functional icing. Overmixing can lead to a thin, runny icing, while undermixing can result in a thick, lumpy texture. The ideal consistency is smooth and spreadable, neither too thick nor too thin. Regular checks during the mixing process are crucial. If the icing is too thick, add a tablespoon or two of milk or water at a time, mixing thoroughly after each addition.
If it’s too thin, add a tablespoon of powdered sugar at a time, mixing until the desired consistency is reached. Using a candy thermometer (for the water or milk component) can also help maintain a controlled consistency.
Storing the Icing for Optimal Freshness
Proper storage is vital to maintaining the icing’s freshness and preventing unwanted changes in texture or taste. Store the icing in an airtight container in the refrigerator. This will help maintain its consistency and prevent it from drying out. To prevent a hardened icing, ensure the container is tightly sealed to maintain moisture. Before using, allow the icing to soften to room temperature for easier application.
This can be achieved by placing the container at room temperature for a few minutes.
Preventing Icing from Becoming Too Thick or Too Thin
Maintaining the ideal consistency is a balancing act. If the icing becomes too thick, add a small amount of liquid (milk, cream, or water) a tablespoon at a time. If the icing becomes too thin, add more powdered sugar, one tablespoon at a time. Thorough mixing after each addition is critical. A good practice is to prepare a small portion of icing first, then use it as a test sample to adjust consistency.
Decorating Techniques
Decorating with old-fashioned chocolate icing offers a vast array of possibilities. Simple techniques like piping rosettes, swirls, and borders can transform plain cakes and cupcakes into elaborate masterpieces. For a more intricate look, consider using stencils or templates to create unique patterns. For added flair, experiment with different colors by adding food coloring. Practice different techniques with practice runs to gain confidence in your decorating abilities.
Decorating with Old Fashioned Chocolate Icing
Transforming a simple cake into a culinary masterpiece is a journey that begins with the right icing. Old-fashioned chocolate icing, with its rich flavor and smooth texture, offers an array of decorating possibilities. From simple swirls to intricate designs, this guide will walk you through the exciting world of icing artistry.
Essential Decorating Techniques
Mastering the art of decorating requires understanding the nuances of the icing. Proper consistency is key. A too-thick icing will be difficult to pipe and create clean lines, while a too-thin icing will run and lose its shape. Achieving the perfect consistency is essential for achieving professional-looking results. Practice is crucial, as every baker develops their own touch and rhythm.
Consistency for Different Techniques
The ideal consistency for a decorating technique directly influences the outcome. A stiffer icing is better suited for intricate designs and detailed work, while a smoother, thinner consistency works well for flowing patterns and simple decorations. Experimentation is key to finding the perfect consistency for your chosen design. For instance, adding a few drops of milk or cream to the icing can thin it, whereas adding a little more powdered sugar will thicken it.
Tools and Techniques for Intricate Designs, Recipe for old fashioned chocolate icing
A wide array of tools can enhance your decorating skills. Piping bags with various tips, from simple round tips to elaborate floral tips, provide versatility. Practice with different tips to develop a feel for the patterns they create. Also, consider using a bench scraper or spatula for smoothing and leveling the icing on the cake. Additionally, specialty tools like a piping gun, or a decorator’s knife, can significantly speed up the process.
Creating Cake Designs with Old Fashioned Chocolate Icing
| Cake Design | Description | Icing Consistency | Tools |
|---|---|---|---|
| Simple Swirls | A classic and elegant look achieved with simple, flowing strokes. | Medium consistency | Piping bag with a round tip, spatula |
| Floral Designs | Intricate patterns that mimic natural flowers and foliage. | Slightly stiffer consistency | Piping bag with various floral tips, stencil |
| Geometric Patterns | Structured and precise designs with sharp lines and angles. | Stiff consistency | Piping bag with a star or other geometric tip, ruler |
| Textured Surfaces | Creating a textured surface with patterns or stippling. | Medium consistency | Piping bag with a ribbed tip, spatula |
Using Stencils and Other Decorating Tools
Stencils provide a framework for creating uniform and repeated patterns. They’re particularly helpful for achieving consistent results, especially when working with intricate designs. The process involves placing the stencil on the cake, applying the icing through the openings, and carefully removing the stencil. Other decorating tools like a decorating comb can be used to create textured patterns and add depth to the icing.
This old-fashioned chocolate icing recipe is a classic for a reason. While you’re waiting for the icing to thicken, perhaps you’d like to enjoy the vibrant energy of Newport Beach, CA. Check out the stunning views from newport beach ca live cam. The perfect backdrop for a sweet treat like this, and the rich, decadent flavor of the icing will make your tastebuds sing.
Importance of the Right Consistency
The consistency of the icing plays a critical role in the final look of the cake. A proper consistency ensures the icing holds its shape and doesn’t run or sag. Achieving this balance is key to achieving a professional and polished finish. It’s crucial to adjust the consistency based on the intended design. Experimentation with different consistency levels allows you to discover what works best for you and your creations.
Troubleshooting Common Issues

Troubleshooting common issues with old-fashioned chocolate icing is crucial for achieving a perfect result every time. Understanding potential problems and their solutions allows bakers to confidently navigate the process and produce consistently delicious icing. This section provides insights into potential problems and how to effectively address them.
Icing is Too Thick
Consistency is key when working with icing. If your icing is too thick, it may be difficult to spread or pipe. This can often be due to an insufficient amount of liquid, or a ratio imbalance in the ingredients. To remedy this, gradually add a few drops of milk, cream, or water, whisking continuously until the desired consistency is achieved.
Icing is Too Thin
Conversely, if the icing is too thin, it may run or spread excessively, making it difficult to maintain a smooth finish on your baked goods. To thicken it, incorporate a small amount of powdered sugar, a tablespoon at a time, whisking thoroughly after each addition. If it is still too thin, consider using a cornstarch slurry.
Icing Separates
Sometimes, the ingredients in the icing may separate, resulting in a visible layering effect. This is often caused by temperature fluctuations or an uneven mixing process. Ensure all ingredients are at room temperature and mix the ingredients vigorously until the icing is completely homogenous. If the separation persists, a quick whisk in the refrigerator may help.
Icing is Drying Out
Preventing the icing from drying out is crucial for maintaining its smooth texture and preventing cracking. To achieve this, cover the icing with plastic wrap or a lid, ensuring that the wrap is in direct contact with the icing’s surface. A humidity-controlled environment is ideal for preventing dryness. Keep the icing refrigerated when not in use to further slow down the drying process.
Icing Cracks
Cracking in the icing can be a frustrating issue. It often results from the icing being too dry, or if it is applied to a surface that is still warm. To fix cracking, try adding a few drops of liquid, such as milk or cream, and gently smoothing the affected areas. Always ensure that the cake or other surface the icing is applied to is completely cool before applying the icing.
Visual Representation of the Process
Visual aids play a crucial role in understanding and mastering the preparation and application of old-fashioned chocolate icing. Images allow for a clear and concise demonstration of each step, facilitating better comprehension and enabling novices to quickly grasp the process. This section provides a comprehensive visual representation of the various aspects involved, from ingredient preparation to the final decorative touches.
Step-by-Step Preparation
Visualizing the process through images is key to mastering the recipe. Each step should be depicted with clear, high-quality images. The images should show the ingredients being measured and combined in a specific order. Crucially, they should highlight the importance of the correct mixing technique and the consistency at each stage. A series of images can showcase the transition from a dry mixture to a smooth, glossy icing.
This old-fashioned chocolate icing recipe is a classic for a reason. It’s a simple process, perfect for a sweet treat. Finding reliable tech support, however, can sometimes be trickier. Fortunately, Cincinnati Computer Cooperative Cincinnati OH provides expert computer repair and support in the community. Returning to the icing, the key is precise measurements and a gentle touch for the perfect, smooth consistency.
The images should also showcase the importance of the different temperatures involved and the necessary tools for each step.
Decorating Techniques
Visual representation of different decorating techniques is essential. Images showcasing various piping techniques, such as rosettes, swirls, and borders, are helpful. Examples of different types of piping tips and their corresponding designs will illustrate the possibilities. Additionally, the images should demonstrate the application of the icing onto the cake, highlighting proper coverage and even distribution.
Tools Used for Icing
Images showcasing the different tools used for icing provide a valuable reference. A visual guide can include images of measuring cups and spoons, mixing bowls, spatulas, and different types of piping bags and tips. Highlighting the correct use of each tool in the process, including the proper technique for holding and manipulating them, is essential.
Consistency Types
A visual representation comparing different consistency types of icing is a great learning tool. The image should clearly illustrate the differences between a thick, stiff icing and a smooth, pourable one. Include images of different types of icing with different thicknesses, highlighting how the consistency impacts the decorating outcome. A simple table outlining the characteristics and appropriate applications for each consistency would enhance the visualization.
| Consistency Type | Appearance | Application |
|---|---|---|
| Stiff | Thick, firm | Excellent for detailed piping, borders, and intricate designs |
| Medium | Slightly firm, easily spread | Suitable for covering cakes, smooth layers, and basic designs |
| Thin | Smooth, pourable | Ideal for flooding cakes and creating smooth surfaces |
Cake Designs
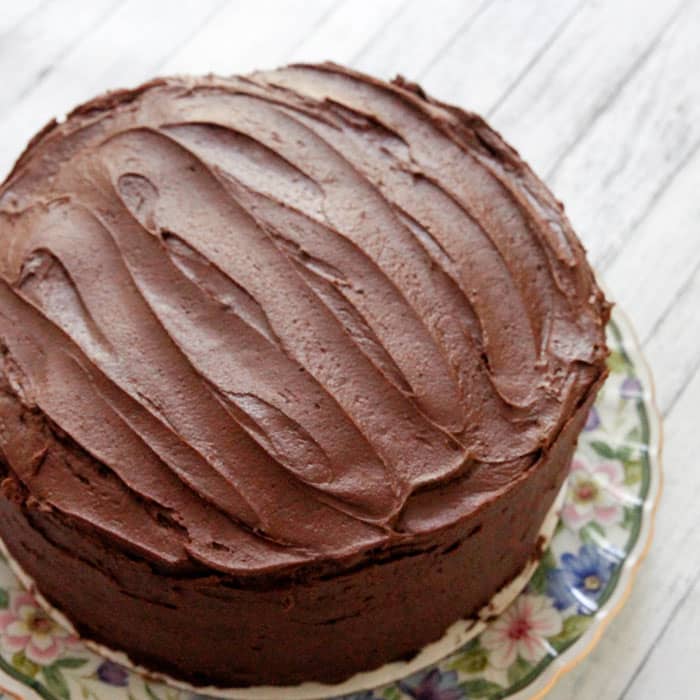
A visual representation of cake designs using old-fashioned chocolate icing is crucial. Images should showcase a variety of cake designs, from classic designs to modern, elaborate creations. Showcasing a variety of cake designs demonstrates the versatility of the icing. The images should highlight how the same icing can be used to create entirely different and visually appealing cakes.
The images should also depict the use of different colors, textures, and decorations in conjunction with the icing.
Final Summary: Recipe For Old Fashioned Chocolate Icing
So, you’re ready to make old fashioned chocolate icing? This comprehensive guide has covered the history, variations, ingredients, techniques, and decorating ideas. Now you’re armed with the knowledge to create stunningly beautiful cakes and desserts. Happy baking!
Question Bank
What’s the difference between Dutch-processed and natural cocoa powder?
Dutch-processed cocoa powder is treated to neutralize its acidity, resulting in a smoother, more intense chocolate flavor. Natural cocoa powder retains its natural acidity, giving it a more complex and sometimes slightly bitter taste.
How long can I store the icing?
Store leftover icing in an airtight container in the refrigerator for up to a week. To prevent it from drying out, cover it with plastic wrap pressed directly onto the surface.
Can I use different types of milk in the icing?
Yes, you can. Whole milk will give a richer flavor, while 2% milk will give a lighter consistency. Experiment and see what you like best!
What if my icing is too thick?
Add a tablespoon of milk at a time until it reaches the desired consistency. Too much milk will thin it out too much, so add it slowly.
